Community
Yoga for Tech Divers
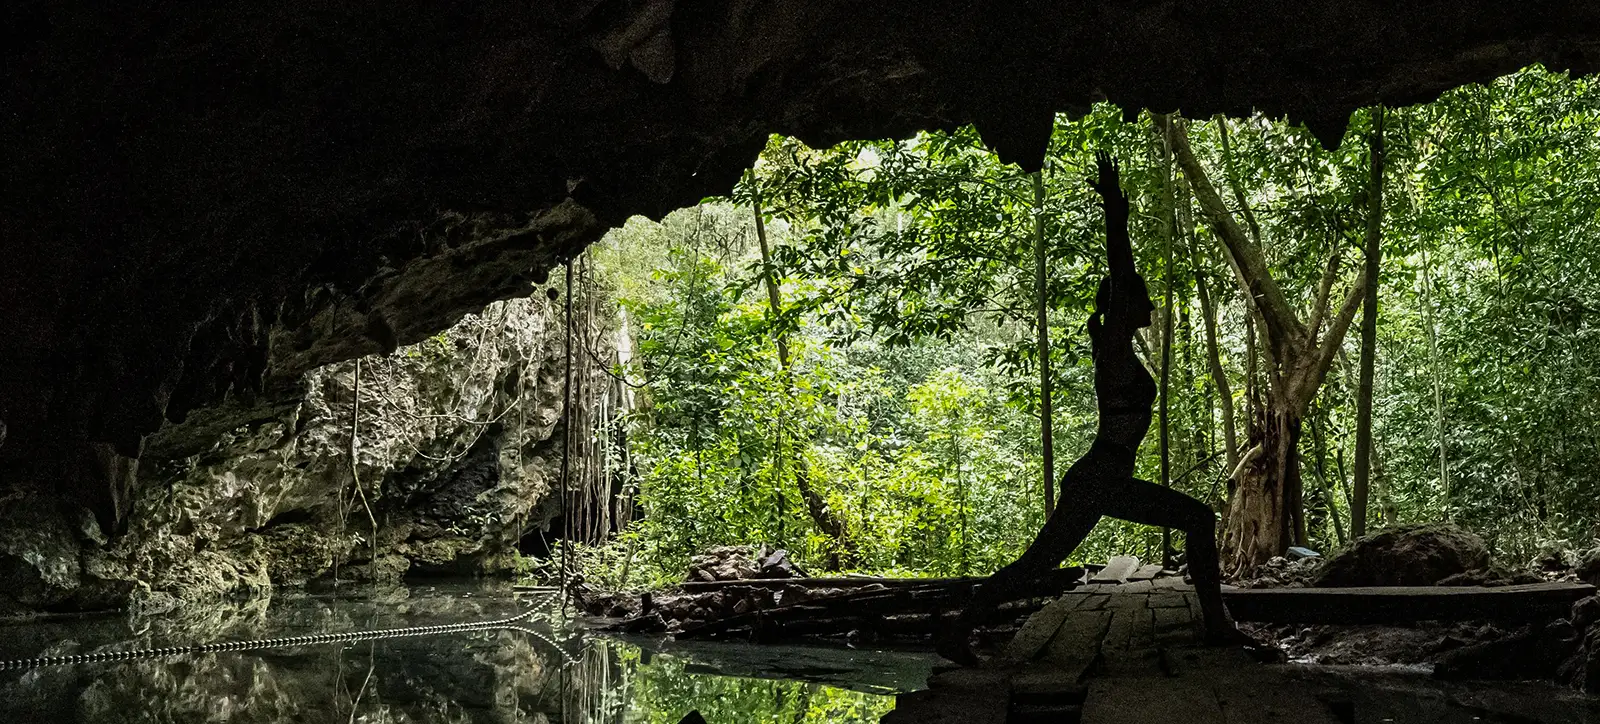
As our freediving brethren discovered long ago, yoga offers many tangible benefits for divers, and tech divers are no exception. In fact, equipment-intensive tekkies may have even more to gain. Here instructors Tamara Adame and Maria Shagina explain what you need to know to get started. They also offer up a few examples of poses that can kickstart your yoga practice and/or help you relax pre or post-dive without having to visit a studio. Take a deep breath and dive in!
By Tamara Adame and Maria Shagina. Photos courtesy of Mekan Photography.
🎶 Predive Clicklist: Keb’ Mo’ – Put a Woman in Charge feat. Rosanne Cash 🎶
Inhale, lift your arms up, exhale, bend forward, inhale, look up, lengthen your back, exhale, and jump back to Chaturanga dandasana. As I type, words are flowing like I’ve always known this verse. It’s still somewhere in my system, years after I stopped teaching. Yoga was the first thing I instructed and has almost always been present in my life, just like diving.
Over thirty years ago, a family friend introduced me to yoga. I was 12 years old at the time. It was the same year I completed my Open Water Certification, however, I was far more interested in yoga than in diving at the time. Coincidentally, Maria also came to yoga at the same time that she started diving fifteen years ago; unlike me, she fell in love with diving right away and quickly evolved to become a technical diver. After a car accident, a doctor recommended that she use yoga to prevent mobility complications.
Even though yoga is a spiritual practice and a science, we have both always been captivated by asana, which is only a small part of what yoga is: the poses.
Yoga has taken many different shapes and forms throughout my life: over the years, I’ve shown my family how I can pretzel myself and lock my feet together behind my head, developed an actually steady Ashtanga practice, completed Yoga Instructor Training, spent time learning and studying at a Shala in Indonesia, and taught yoga in a quiet studio in Brussels. Now I use yoga to help me and my students with tech diving.
In this article, Maria and I share how we see yoga and its benefits when diving, training, and recovering from a tech dive and how yoga helps us sustain fast-paced life as technical diving instructors. We also put together a few examples of poses that can kickstart your yoga practice or help you relax pre- or post-dive without having to join a yoga studio.
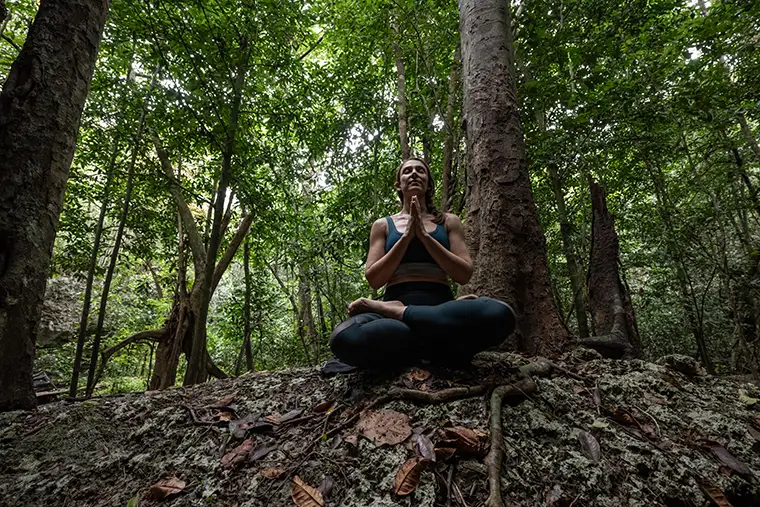
The Benefits of Yoga for Tech divers
There are many aspects of a yoga asana practice that are beneficial for technical divers; if you think that yoga is not for you because you’re not bendy, I have news for you:
If you’re strong but not flexible, yoga will give you flexibility. If you’re flexible but not that strong (like me), yoga will give you strength. Balance is what yoga is all about and, for me, that’s what tech diving is about, too.
Yoga asana is an excellent way of warming up joints, stretching sore muscles, relieving shoulder tension we may accumulate on from carrying gear, releasing hip tightness after hovering long hours, or relaxing our backs after carrying several stages or doing decompression. Yoga is also a great aid in increasing mobility (think of those backmount valve drills), not to mention improving blood and oxygen flow to the cells in our body.
The benefits of doing yoga aren’t only physical, but can also have a positive effect on our mental abilities. Yoga improves control over breathing patterns which can be a primary way of controlling anxiety and stress in the water. Yoga increases awareness (essential for complex tasks), focus, and concentration (needed for executing safe dives) and improves coordination and spatial orientation while decreasing or even preventing stress. As a cave instructor, it is very important that I have tools to keep calm and help others do the same.
If all of these benefits haven’t convinced you to try a five minute pre-dive yoga session, you should know yoga is also known to improve mood; so if getting in your drysuit during the summer is making you feel on edge, maybe you should try a yoga stretch beforehand!
Yoga in Tech Training
Many of the key concepts of yoga apply to technical diving: breath, alignment, core strength, and awareness, for example.
I want to show you how to apply them to unlock the potential of your dives, classes or training dives with simple steps you can follow. This may change the way you execute a practice dive and how you feel after a technical dive.
Do not worry: it is not my intention to draw you into the spiritual world and ask you to meditate in a cave (although many cave divers think of cave diving as meditation).
Think of yoga as a moment where your breath, body, and mind align. It is not about the pose, but the poses offer a chance for your body to consciously move, breathe, and be or act. So, when you attempt a pose (even if it’s modified to fit your current ability and level), you get 100% of the benefit. In this same way, if you struggle to maintain a hover underwater, you make progress every time you try—even if you don’t see it right away, eventually it happens.
In technical diving and yoga, your breath dictates the rhythm of your heart allowing you to control or modify your movements and reactions; your breath allows you to gain awareness and control precision in buoyancy and trim while conducting complex tasks. Learning to breathe underwater is very similar to learning Pranayama, the branch of yoga that covers breath as a tool to connect with your inner self.
Maria takes a moment before a particularly challenging dive to take a few deep breaths and focus, gather her thoughts, visualize the dive, and get mentally prepared. To teach my students better breathing patterns, I give them the following exercise: try inhaling for 3 seconds and exhaling for 4. On the next breath, inhale 4 seconds and exhale 5, and so on. Then try the opposite. Start with a longer inhale of 6 seconds, then exhale in 5, and on the next one inhale 5 and exhale in 3. Control how much gas goes in and out of your airway, regardless of the time the breath takes. You control your breath; your breath doesn’t control you.
Another key element of yoga is alignment. In yoga, we work on balancing the body, establishing equilibrium, moving into symmetrical or asymmetrical poses, and establishing orientation of limbs and rotation of joints. Applied to diving, you can use yoga skills to lift and carry a tank with appropriate technique (preventing injury), stand straight during the briefing or while getting ready, and squat to pick up a crate of gear using your legs instead of your back. Every little movement matters in and out of the water, and so does keeping the belly in and core muscles engaged.
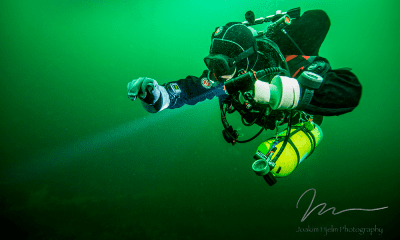
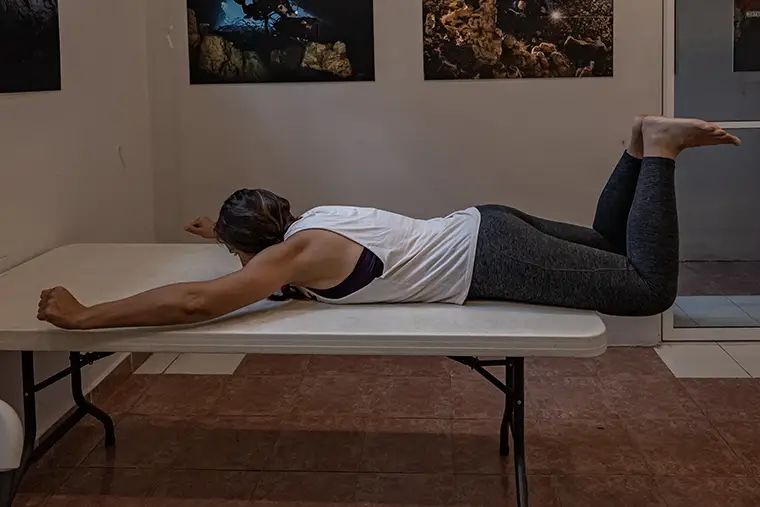
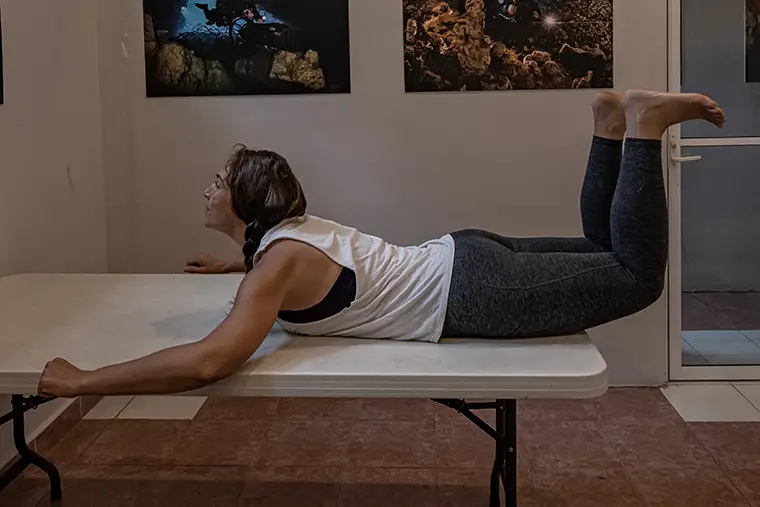
In the water, we teach divers to use core tension to maintain a “tech diver position” with flat horizontal trim and knees and ankles bent 90 degrees. This is best achieved when we focus on each part of the body individually until we develop muscle memory and the hover “just happens.” When I teach a sidemount or cave class, I often use the concept of a “body scan,” just like we do in a yoga class.
A body scan is a conscious inventory of each body part and its position and tension. I ask students to check one body part at a time, starting with the head, and consciously place it, tense it, or move it in a specific way until we have the full body in the correct and aligned position. In the beginning, it is challenging to hold it for more than a few seconds and that’s normal. Eventually, it becomes the way you just “are” in the water.
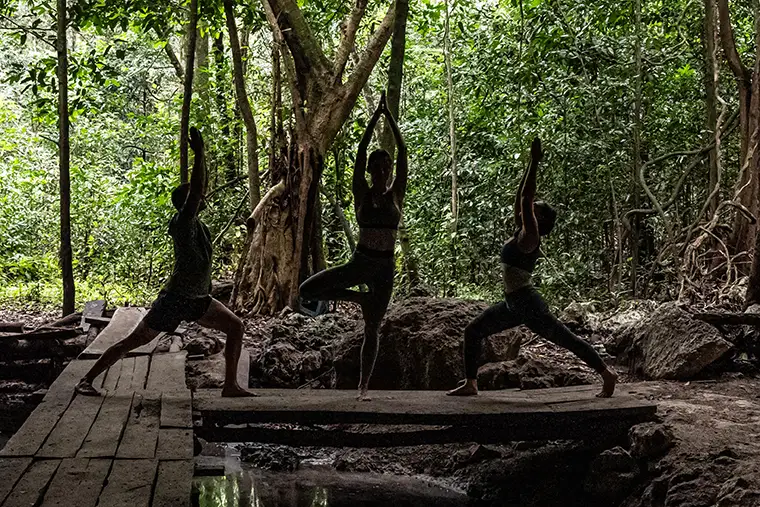
A typical body scan would go like this:
1. Head up, look up, chin up.
- In yoga there is a concept called drishti. A translation would be “gaze.” Where I look matters because the position of my head affects the rest of my body. This is very important in diving; if I look down, my head drives my body down (and it’s difficult to maintain awareness and prevents me from communicating with my team). We want the opposite: look up and your body will stay horizontal.
2. Shoulders down and chest open.
- We do not want excessive tension around the neck.
3. Arms slightly bent.
- I do not want to increase shoulder tension by extending arms like superman; especially diving for extended periods of time, that doesn’t work. Arms fall comfortably at an angle. This allows my light to illuminate in front of me without having the beam directly in front of my face at eye level.
4. Arched back.
- This is how we achieve the tech diver’s signature pose. If I focus only on tensing the back to achieve an arch, I will feel the acute pain that comes with a rusty spine; however, if you focus on pushing the hips down, you will notice the result is an arched back minus the pain.
At this point, we’re almost done.
5. Legs bent but parallel.
- No need to keep them further apart than hip width; knees and ankles should be bent 90 degrees, and feet flexed and aligned with knees. I love to tell students to “Try to touch your shin with your big toe.” They laugh but that tension really flattens your feet and this becomes fundamental to stability. Moreover, feet that are still won’t get you out of position. Talk about preventing problems instead of having to fix them!
Now the tricky part is to maintain the position, while submerged, looking at a menacing cave line approaching slowly in front of you, and which you’re not supposed to cross! It is very likely that you will hold your breath a little longer than needed in order to concentrate on multiple tasks, and by the time you get the pose right, you’ve floated up or sank to the bottom of the cenote. On a good day, it’s low season and no one is watching; don’t worry, we’ve all been there more than once.
This is most students’ biggest challenge when they start cave training at ProTec: to be able to hover statically in front of a line is not a small achievement for someone who has never received tech training in Mexico. We make it look far too easy (guilty as charged), but the shallow depths, the almost-no-flow environment, and the clear water are unforgiving witnesses to our flaws in stability and control. Because of that, we often refer to Mexico as the most difficult environment to train and dive in, even if others think that it is harder to learn to dive deep, high-flow caves (but let’s leave that debate for another article).
While the experience is painful for the ego, the muscle soreness and the lower back pain are soon to become the stepping stones for any other ability you learn. The reason we obsess over basic skills this much in tech diving (aside from the good-looking Instagram shots, of course!) and the reason the ProTec team puts such great effort in leading a healthy and active lifestyle—with many of us practicing yoga regularly in tandem with other sports—is because our basic skills have been built over a solid block called core stability and control. This has a direct impact on safety.
Safety should be every technical diver’s first and utmost priority. If you’re healthy and strong, you’re stable; therefore, you’re more likely to be able to conduct complex tasks (including emergency procedures in stressful situations or on long, difficult dives).
In the words of Jake Bulman, IT and the newest partner at ProTec, “Awareness is being able to do something with the information we perceive.” Perceiving details in our environment without being able to react accordingly or anticipating outcomes is not true awareness.
Now that you have the secret, I hope you will share it far and wide. Maybe we have even inspired a few of you to add yoga to your technical diving life.
Am I Good for Yoga?
Saying that you don’t like yoga because you aren’t flexible enough is like saying you don’t like diving because you don’t have good buoyancy. Flexibility and buoyancy are both skills acquired through a method and, most importantly, practice, practice, and practice!
By the end of my courses, most students hold position through the whole session and have enough tools to continue practicing at their local dive site. This is also quite similar to yoga: you do not need to be in a class to be able to practice, and if you practice every day for a week, a month, or a year, you will see benefits and improvement.
To answer the question: Yes, you are already good enough to do yoga.
When Should I do Yoga?
In our daily lives, we are active from 7:00 am and don’t usually rest until 7:00 pm or even later when we finish the day. Our activities as tech instructors are intense—not only physically but mentally—without mentioning that we spend long hours standing, presenting and debriefing. We also need to take care of ourselves: be it with food, laundry, cleaning, or admin work. If we do not take breaks during key moments of the day to stretch the body and breathe, we will feel it at some point in the shape of utter exhaustion, trouble falling asleep, body aches, and even lack of appetite (or cravings!).
Just like on a dive, we check that life support and gear are working, and we go over limits and visualization. There are a few ways to start on yoga for your tech diving activities, with only a few minutes investment a day, to make sure you’re ready for the heavy day ahead, or to unwind from having lifted all those tanks.
You will notice that most of the asana and stretches we present below focus on lengthening the body, or bending forward. Yoga is about balance, remember? Since most of us who are trying to stay in horizontal trim are arching the body, we have selected poses that counter that movement to give our bodies balance.
This also means that if you create your own yoga sequence (either inspired by these poses or after browsing a little on the web), you want to keep in mind the balance between poses or between the activities you practice during the day if you’re not a tech diver.
If you work in an office and tend to hunch in front of the laptop, then heart and shoulder openers as well as backbends may work better for you. Remember that, with poses that open your chest, you should take an inhale; poses that bend your core forward should end with an exhale as you get into the pose.
yoga should not hurt, but we must become acquainted with discomfort. If something is uncomfortable, we should allow our body to adjust, breathe through it, and observe why it is uncomfortable and how this feeling changes after a few seconds or minutes. If something is painful, we should get out of the pose to avoid injury.
The First Step
In the next section, you will find a list of suggestions for yoga poses you can practice. This is by no means a comprehensive guide to yoga but it can help you in the early stages. While we are sure you can find the right spot to practice these, it doesn’t mean you must practice them at the dive site—although some are that easy. Once you get the idea, you can use the poses individually or in a series.
Sun Salutation A
Benefits: Boosts digestion, improves flexibility, tones muscles, improves quality of blood circulation, energizes the body, and more.
Each of the steps in this sequence is complementary and linked to the next. You will notice that back bending alternates with forward bending; we flex and extend, stretch and contract, and engage every muscle in the body when this is done right. As easy as it looks, it becomes a complete exercise that can be done within a short time and is extremely beneficial for you. It can also be adapted and modified to one’s ability and comfort.
How to Achieve It?
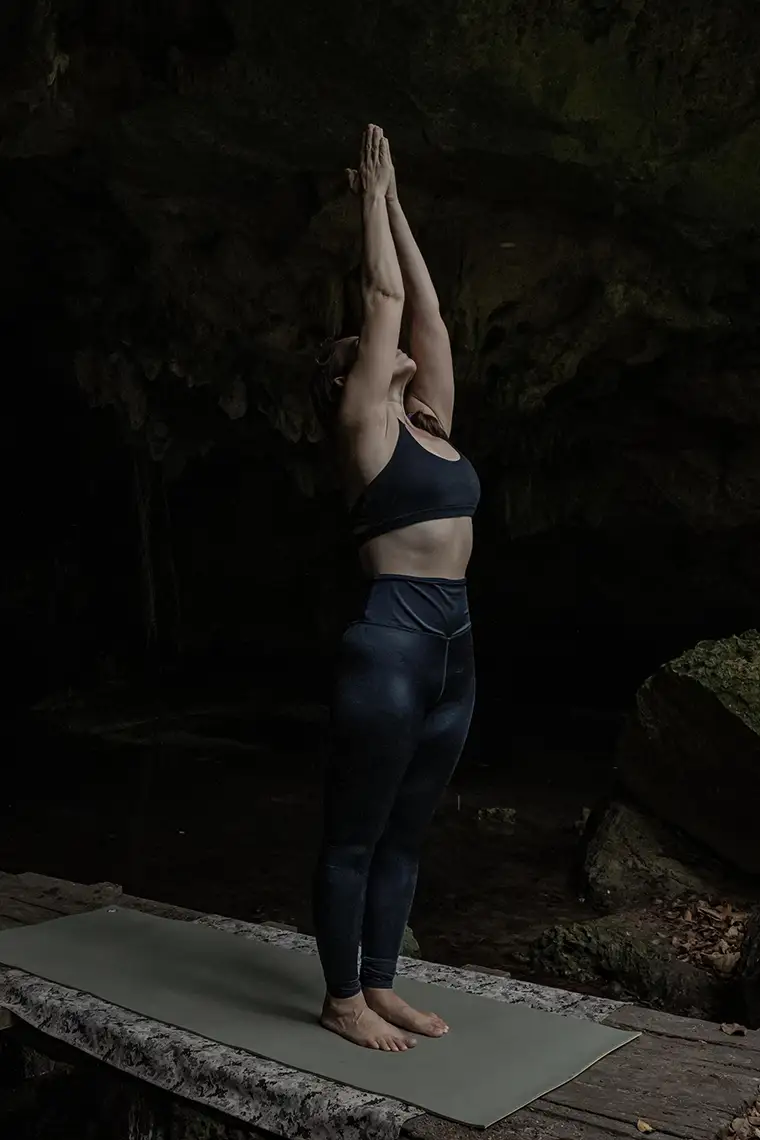
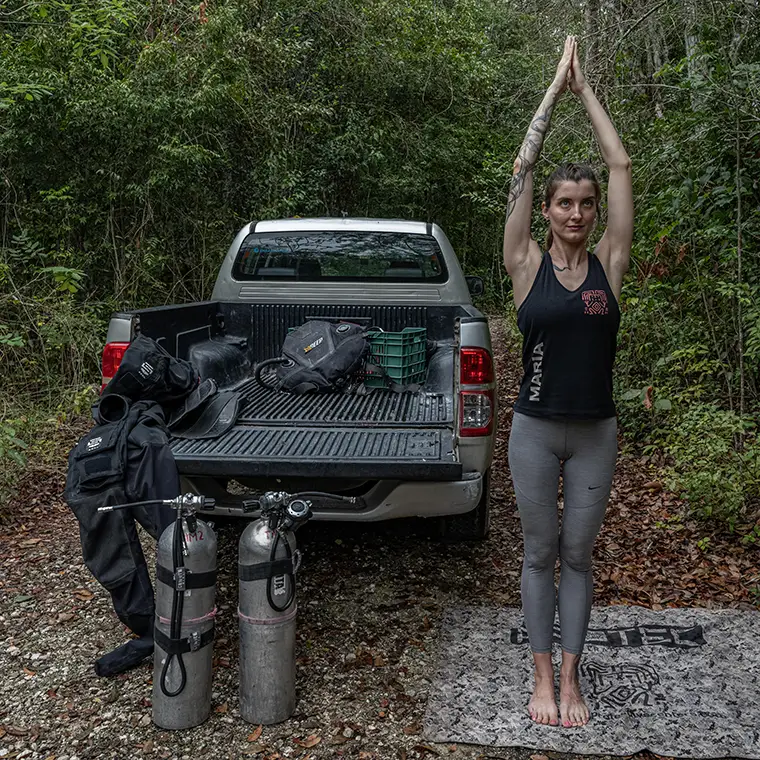
To start, stand with your feet hip-width apart and neutralize your hips by tilting your pelvis forward. Keep your arms straight down. Relax and lower your shoulders away from your ears. Open and lift your chest by gently contracting your extrinsic back muscles and engaging your calves. This is called Tadasana or Mountain Pose. Breathe deep and slow.
On an inhale, lift both arms, reaching for the ceiling. This pose is called Urdhva Hastasana, Palm Tree pose. This pose will stretch your lateral muscles before going into a forward bend or Uttanasana with your fingertips reaching for the ground or touching it as you exhale completely. This is an intense stretch for the rear side of our bodies: calves, hamstrings, and erector spinae. This pose also massages the abdominal organs and tones the spinal nerves.
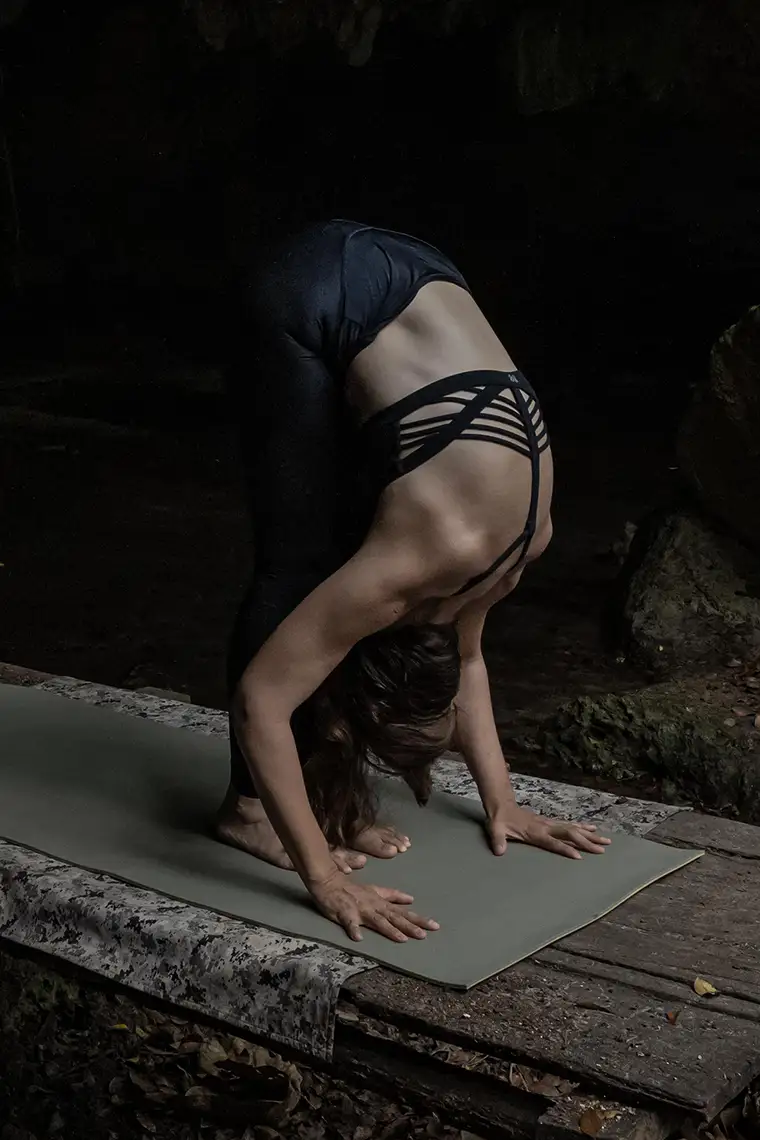
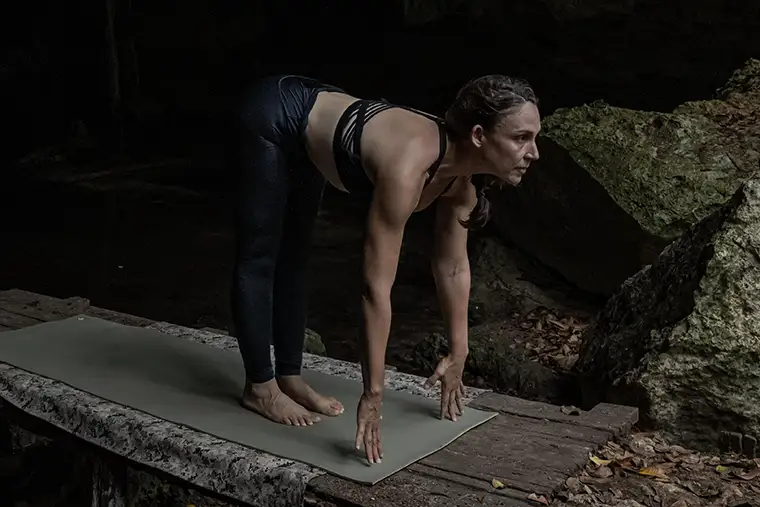
From the forward fold, inhale again and look up, strengthening your back. Take a big step back into a lunge while you exhale and let your hips sink towards the ground. You will feel the stretch of your hip flexors of the back leg, glute muscle of the front leg, shoulders, chest, and even abdomen muscles.
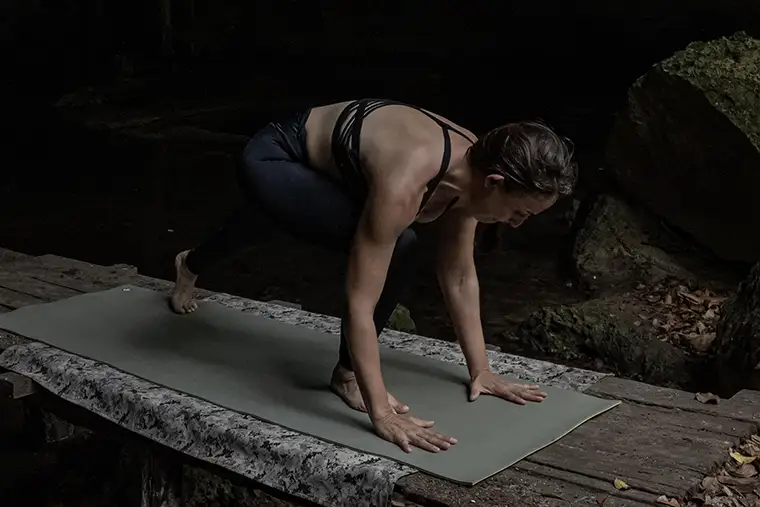
Bring your other foot back onto a solid plank and then exhale down to Chatturanga Dandasana or Staff pose, with your elbows bent so that your upper arm is parallel to the floor. This is probably the most challenging part of the sequence and resembles a pushup.
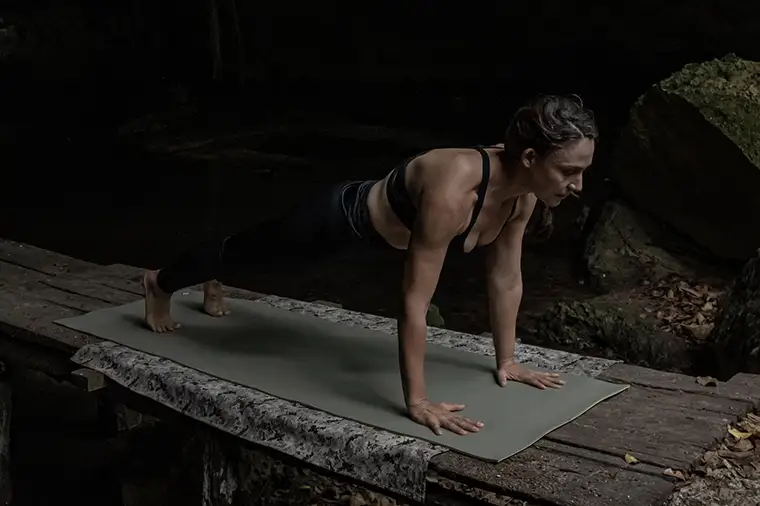
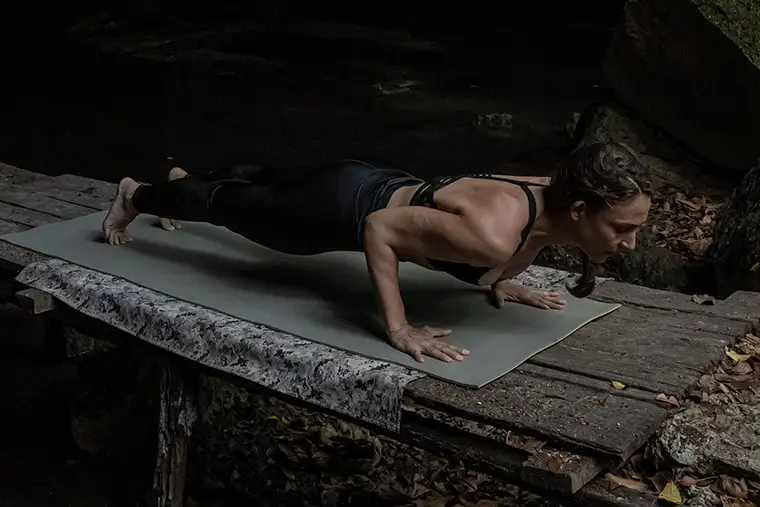
This pose works your deep abdominals, spine muscles, glutes, and hip muscles.
Moving up to the famous pose Upward Facing Dog or Urdhva Mukha Svanasana with an inhale, use your arms to lift your torso up with a slight backbend, lifting your chest up and looking up (remember the gaze has an important effect on the position of our body and the gaze up intensifies the stretch!), stretching your hip flexors and abdominals.
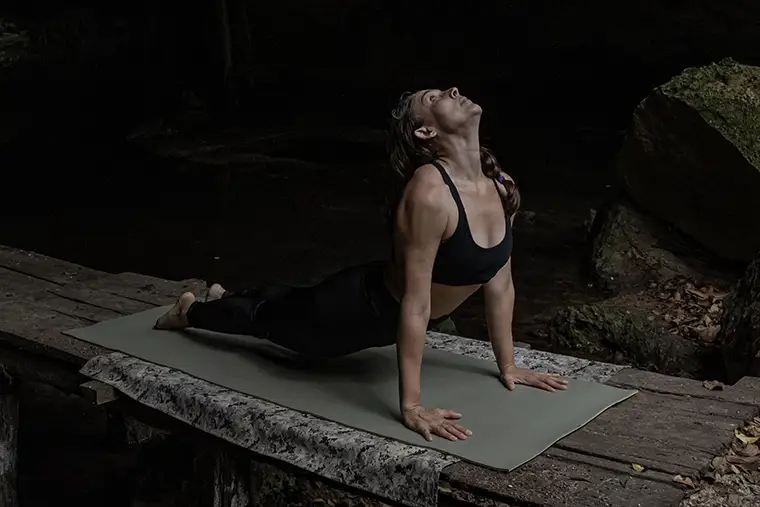
From the extension of the hips and spine, exhale and go into flexion of the hips and a neutral spine, which is a Downward Facing Dog pose or Adho Mukha Svanasana. Here, stay for three to five breaths to let the body rest in an active position. Try to look between your knees for a maximum extension of your spine.
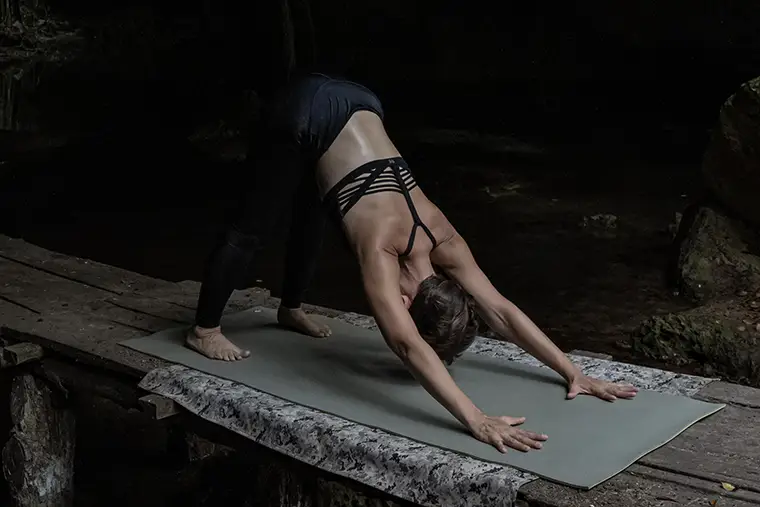
There are several ways of modifying the series; see photos for ideas.
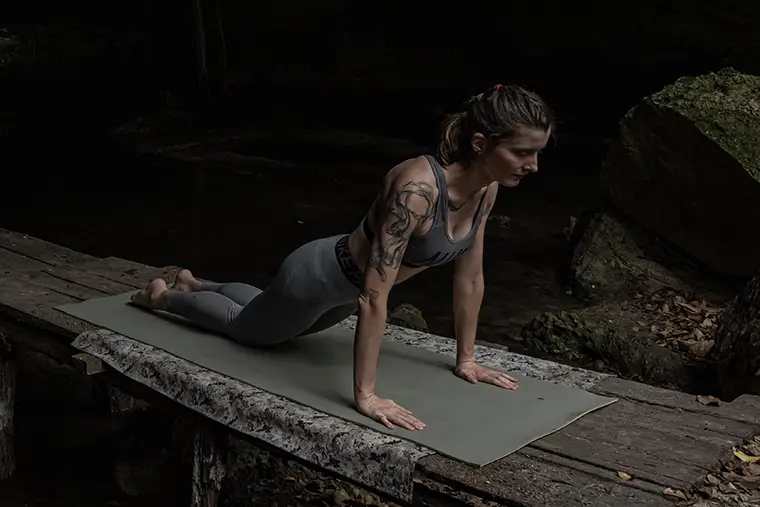
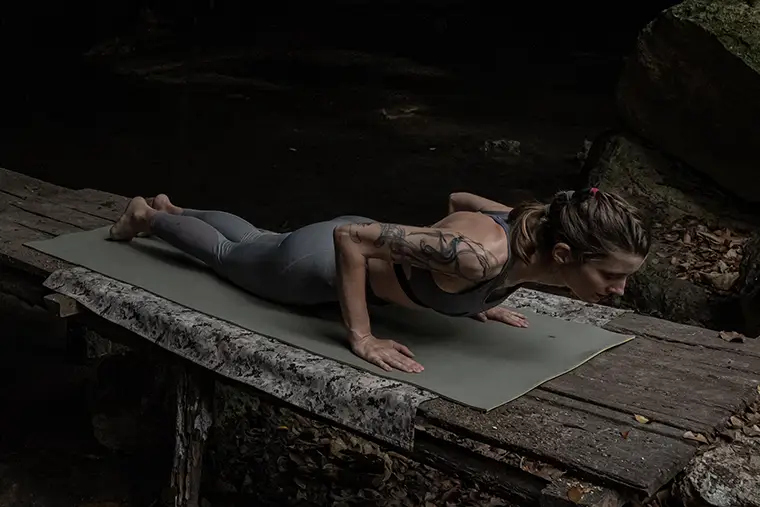
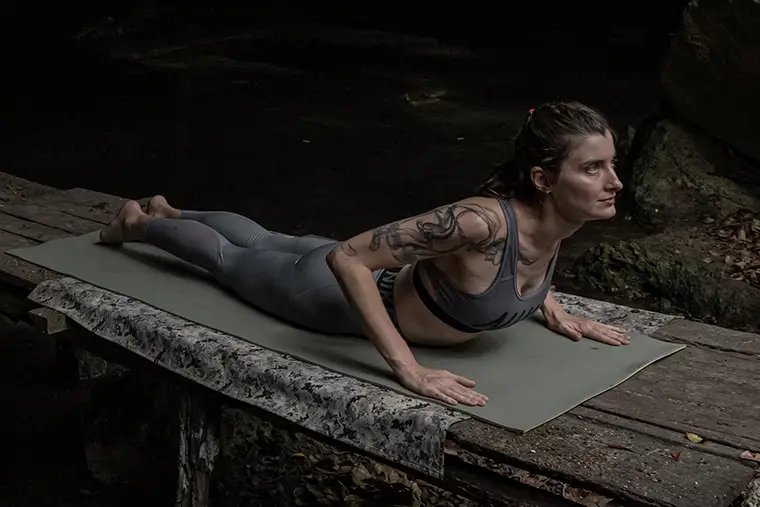
The Sun Salutation finishes off by transitioning back to the initial standing pose; spread your arms open, lift them high above your head, and inhale back to Palm Tree pose, and then exhale once more as you lower your arms.
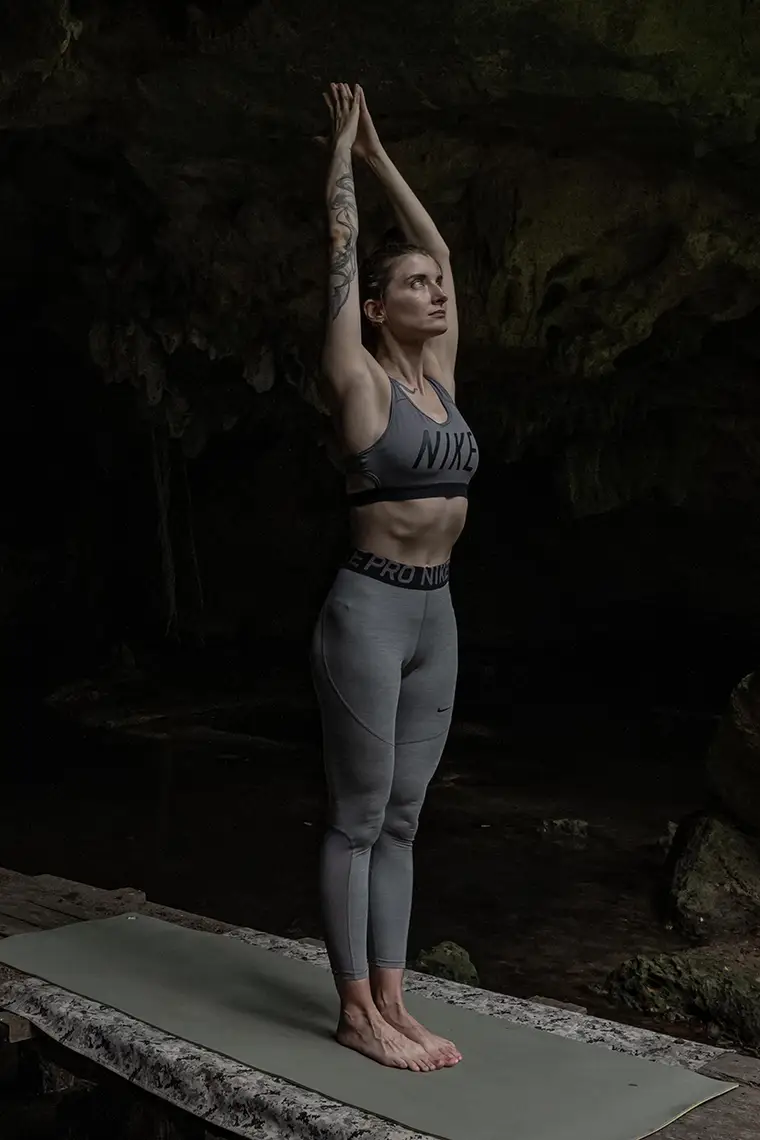
You can repeat 3 to 5 sun salutations. This will warm your body and energize you. Mind, this is usually not practiced at night because sleeping may be difficult after practicing.
Other Asana for Divers
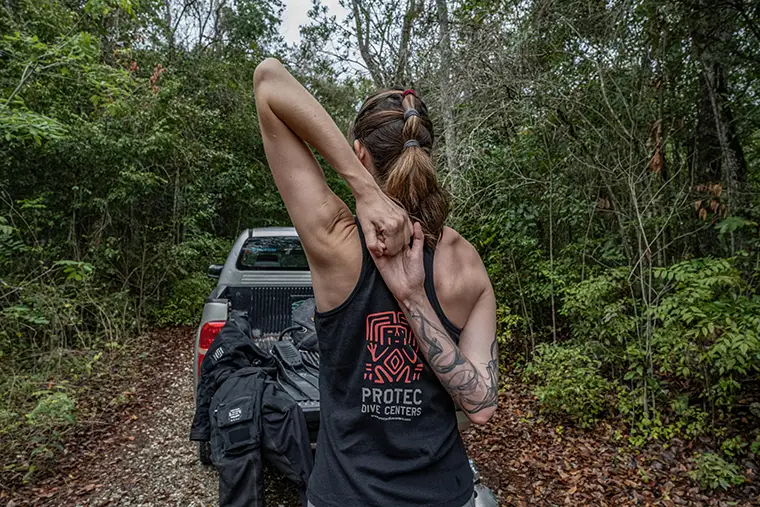
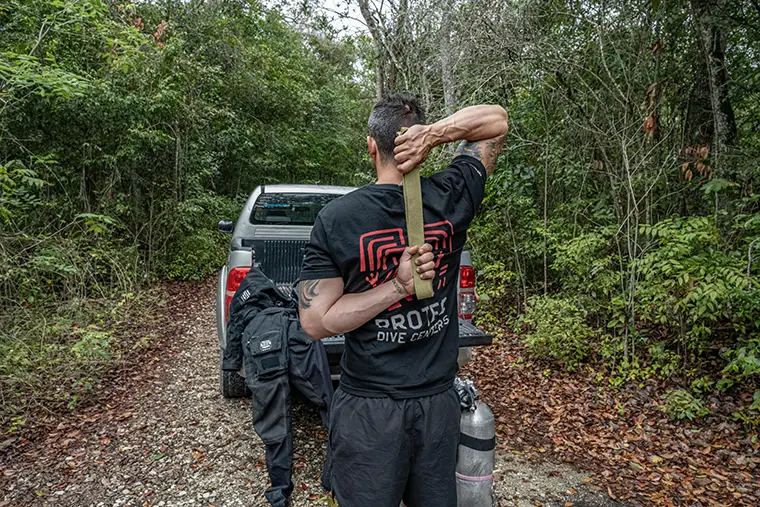
Gomukhasana, Cow Face (the arms)
Benefits: This is a great shoulder warmup.
Extend both arms out, then bring one arm straight above your head and the other down parallel to your body. Then bend the elbow and try to meet both hands behind your back.
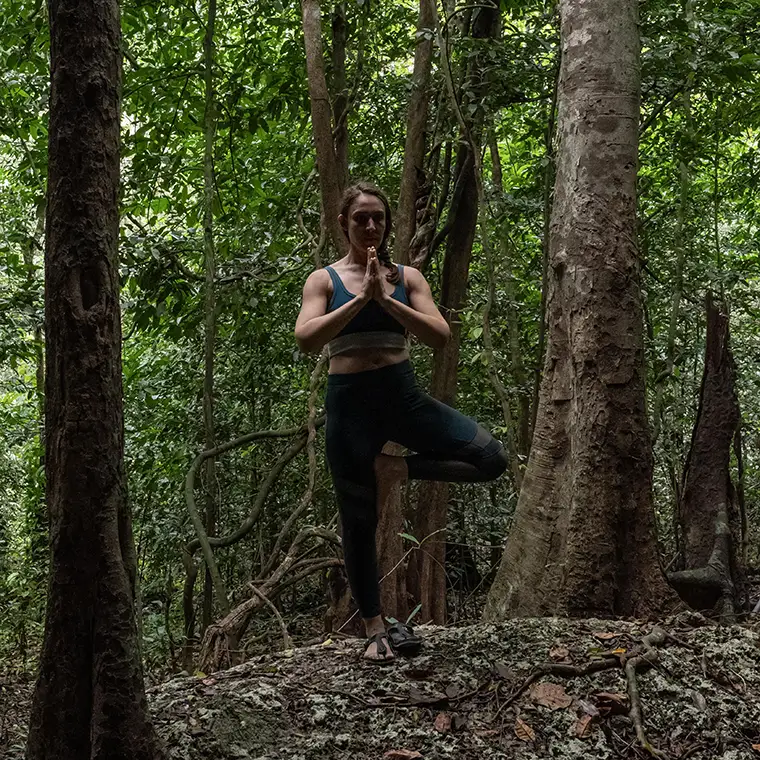
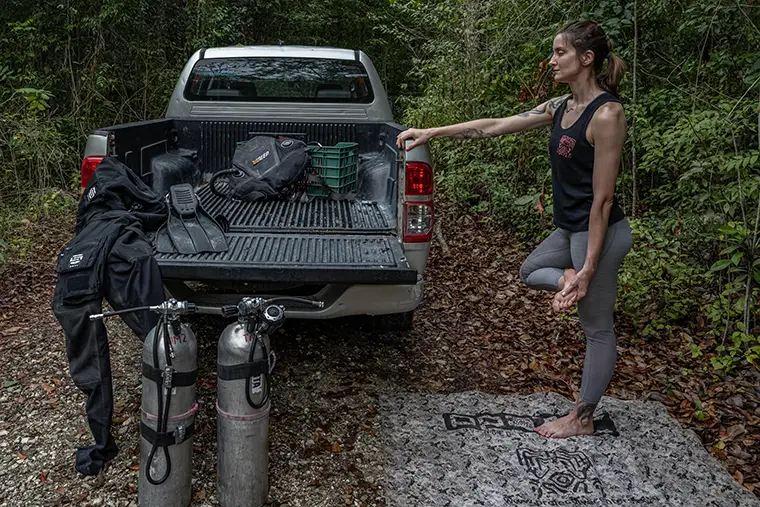
Vrksasana, Tree Pose
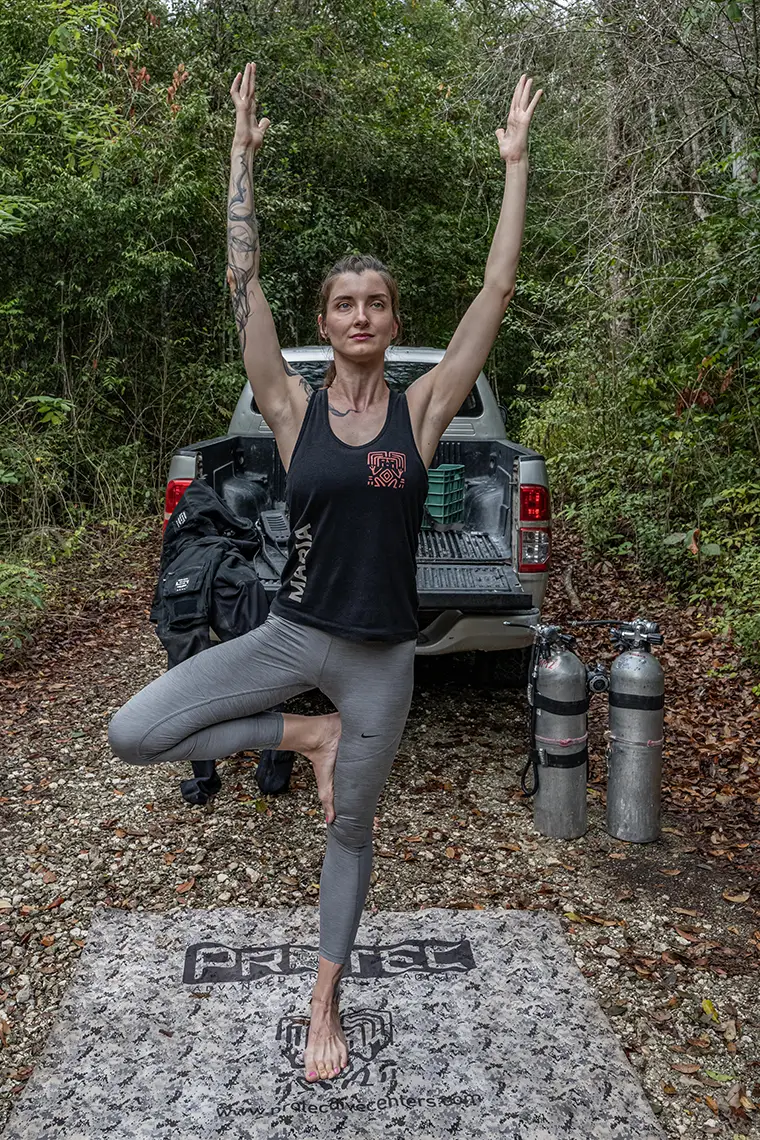
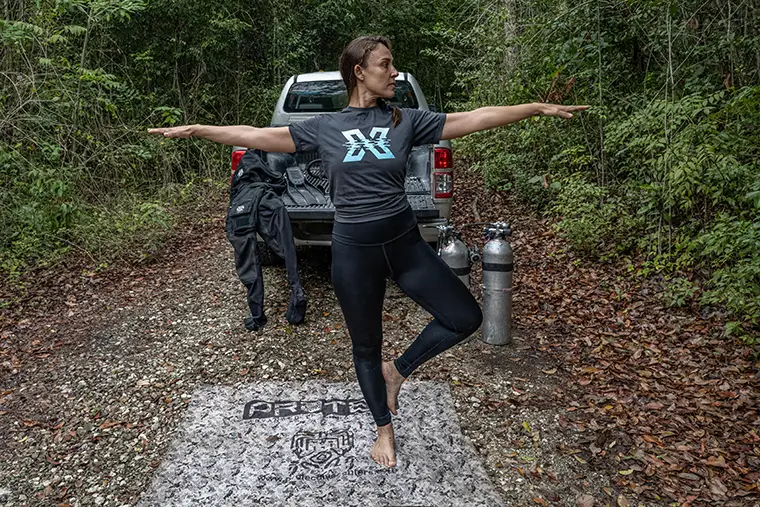
Benefits: This pose stretches your thighs, shoulders, and back. It will force you to bring awareness to your body as it is challenging your stability.
Stand in Mountain Pose and bring your knee up. You may hold it with your hand. Open your leg to the side and place your foot on the inside of your leg at a level that is comfortable for you. Engage your ankles, legs, and core, search for balance, and observe what happens when you use the hips to gain balance (like we do when we learn a hover position).
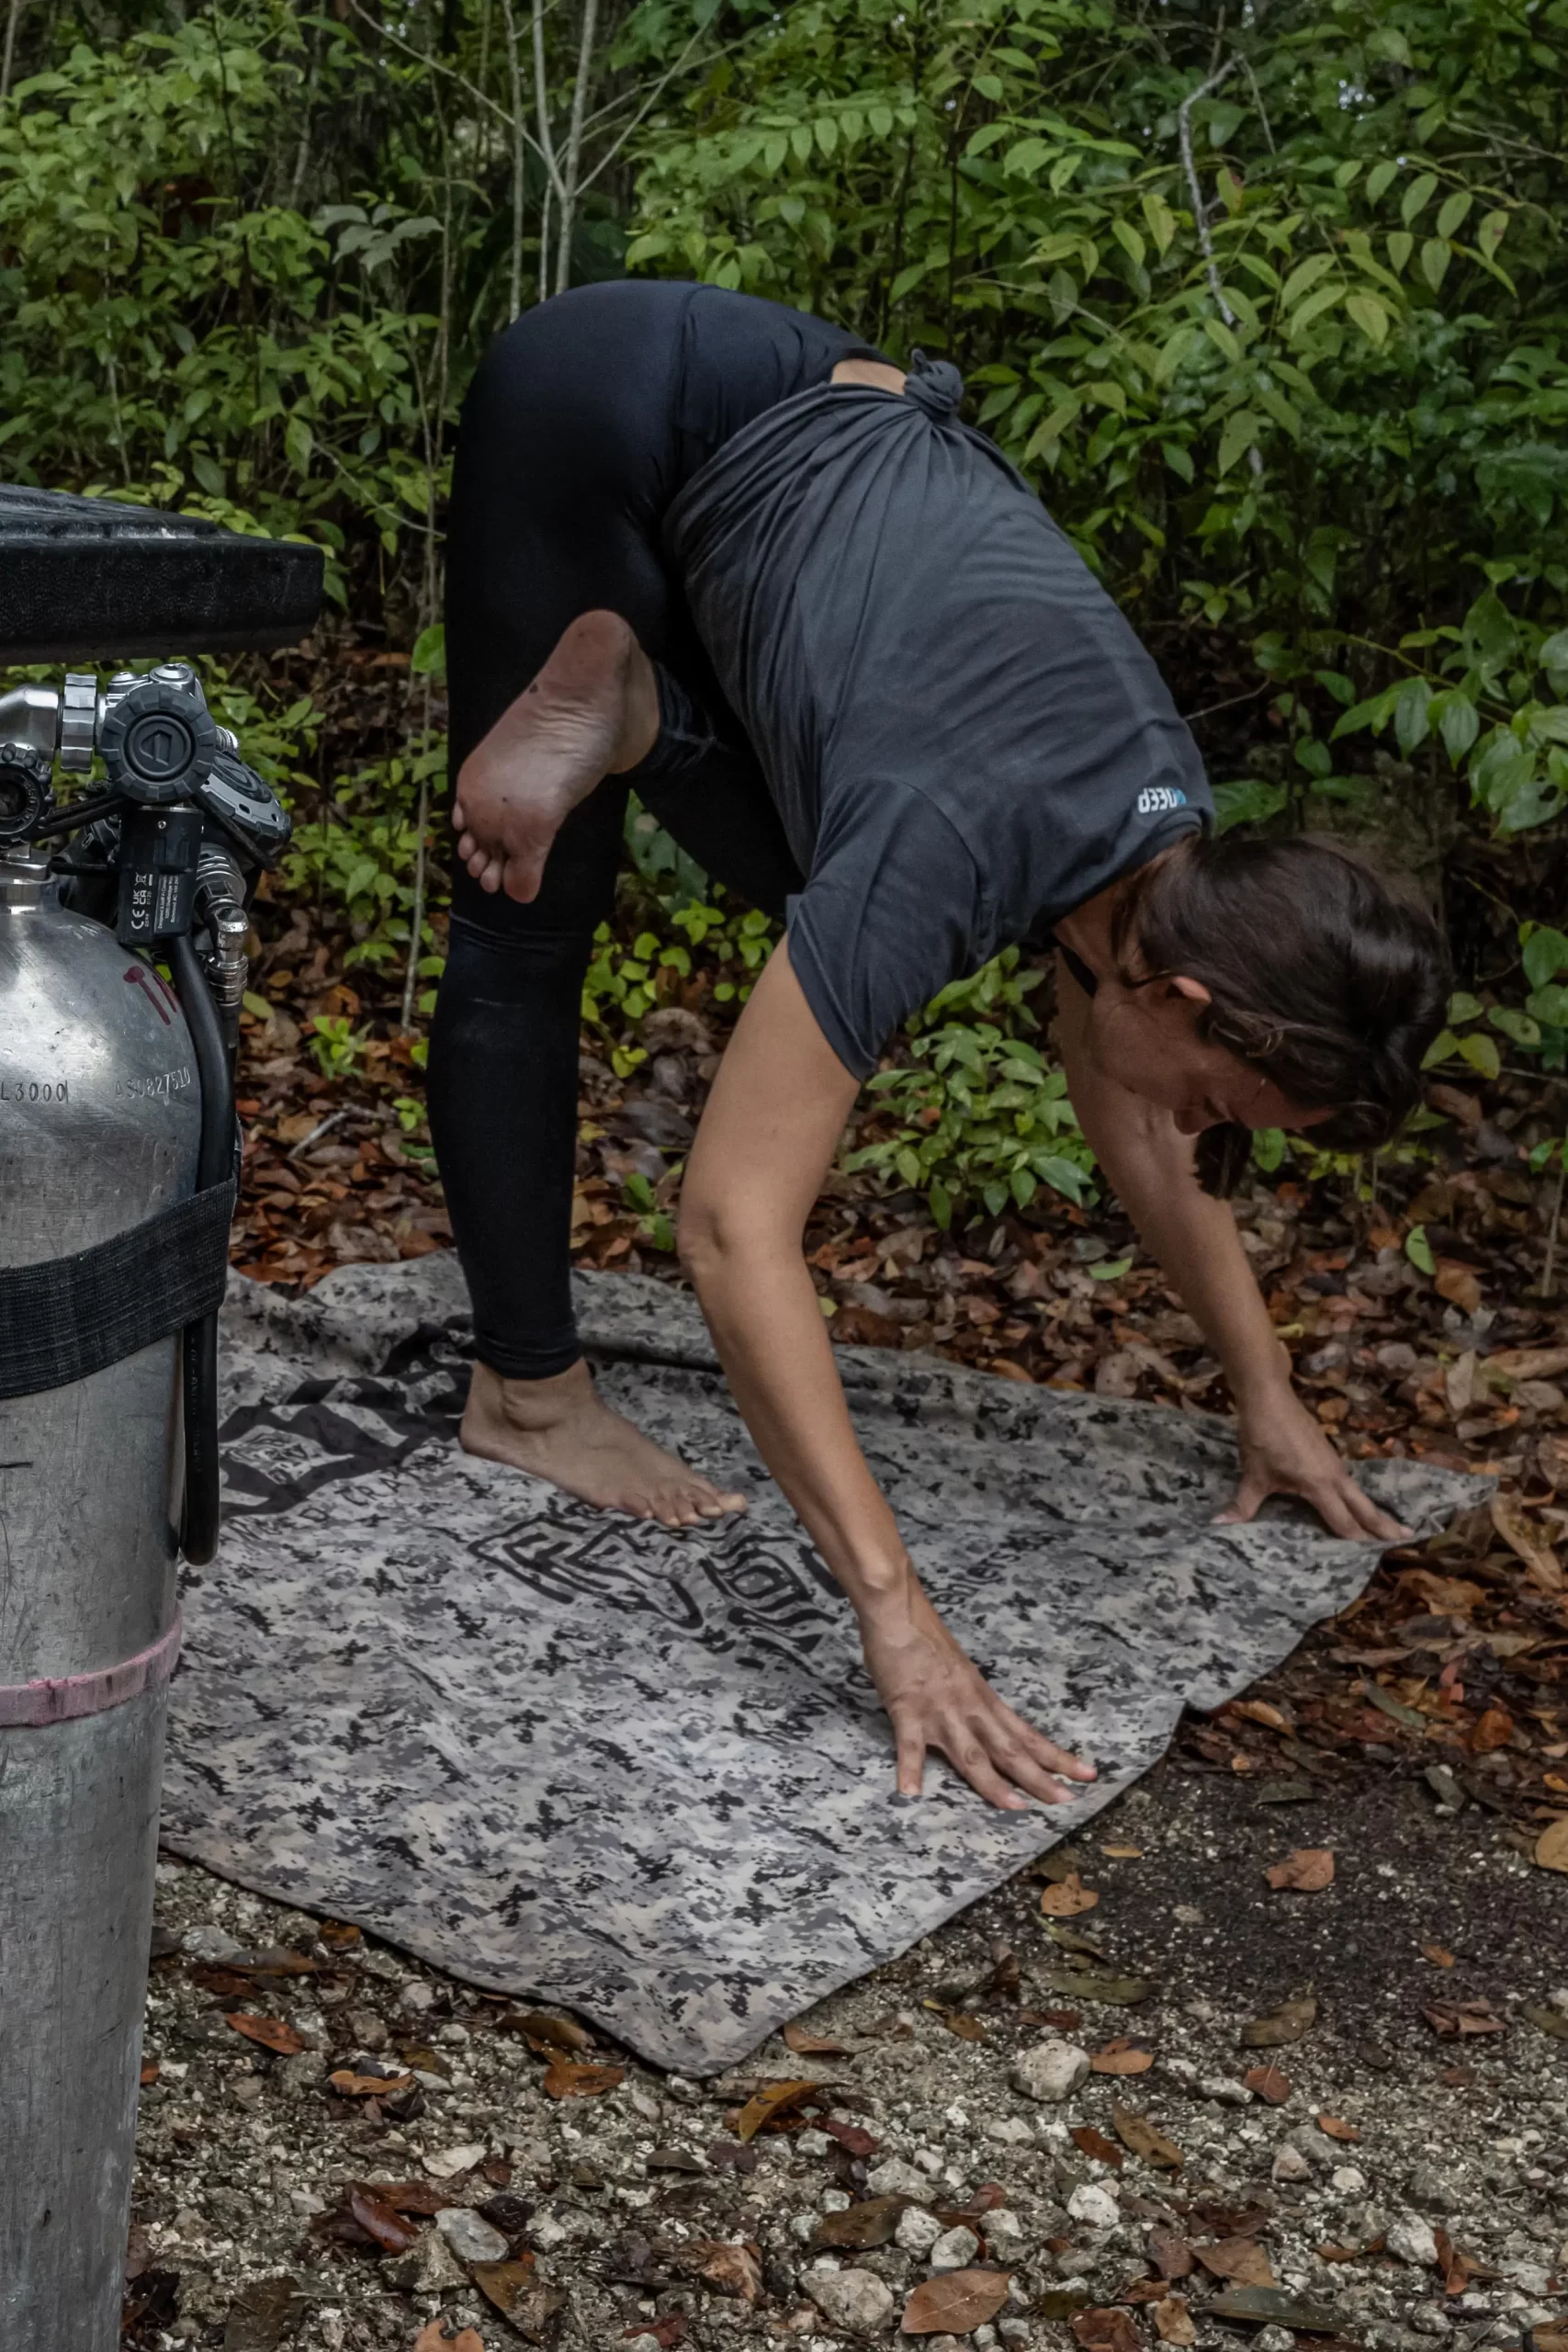
Ardha Badda Padmotanasana, Half Lotus Pose
Benefits: Balancing your body weight on one leg helps strengthen your legs and improve flexibility while using your pelvic muscles. It’s great for your digestive system and inner organs too.
Start in Mountain Pose and move on to Tree Pose gently, then bring your foot over your standing leg and push your knee slightly backwards to open your hip. Bend forward slowly (you can do this holding on to a support) and reach for the ground with your hands.
Urdhva Hastasana Ardha Chandrasana, Side Bending Pose
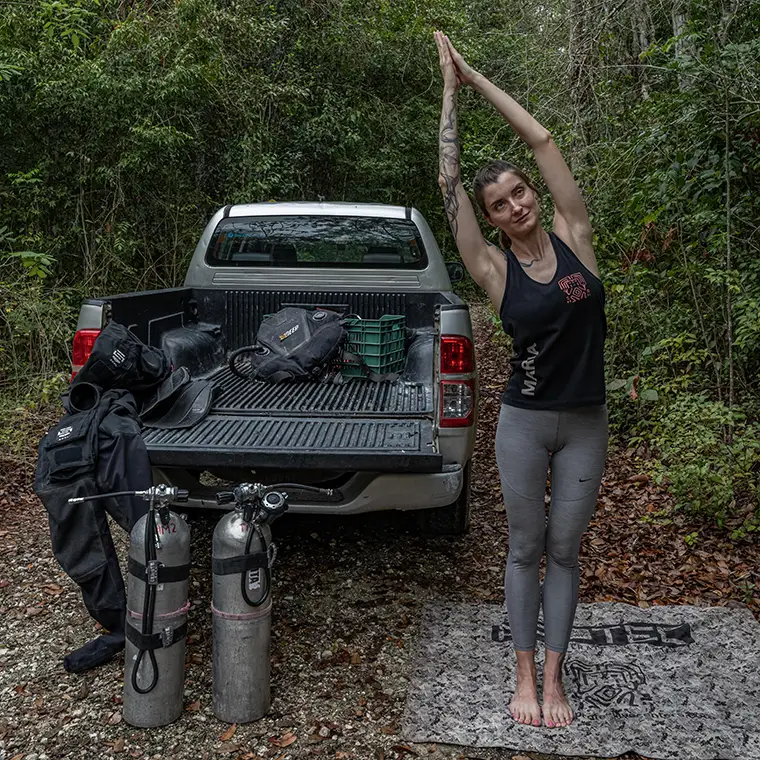
Benefit: This pose stretches and strengthens your back and oblique muscles, toning your side, waist, and stomach.
Start in Mountain Pose. On the exhale, start bending sideways, slow and controlled. Keep your hips in line, look up, and continue opening the chest upwards.
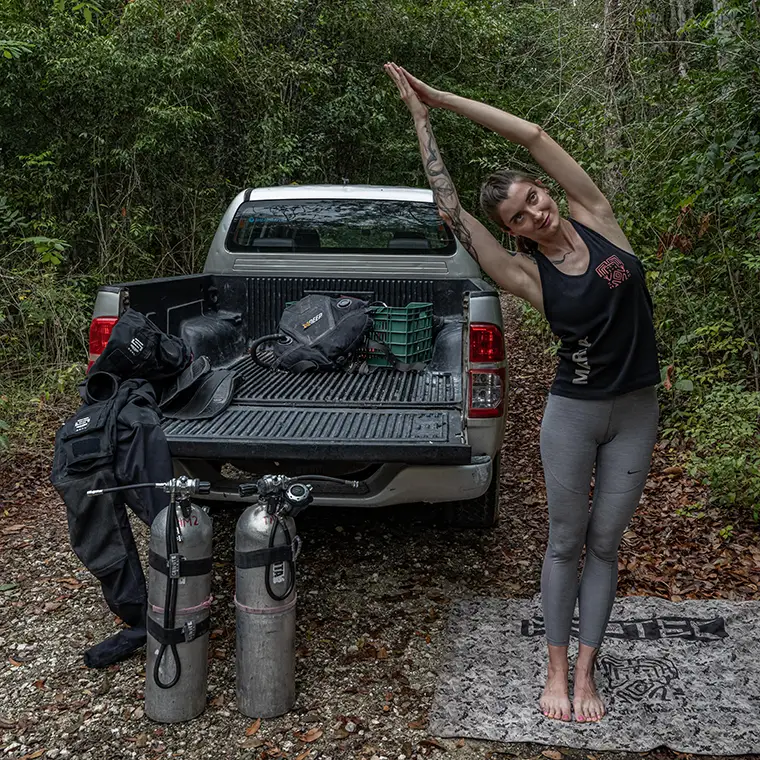
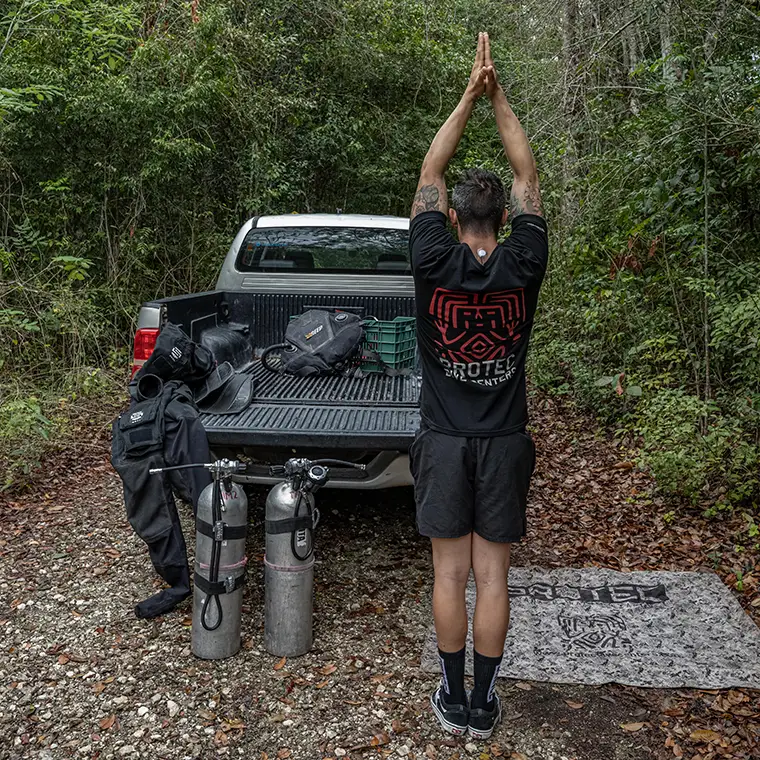
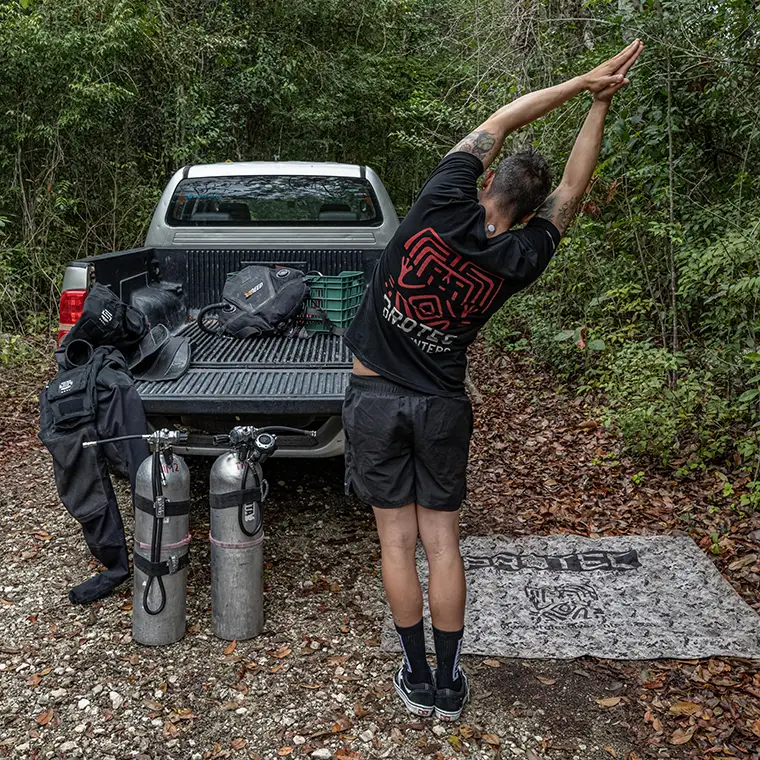
Pada Hastasana, Hands Under Feet
Benefit: This deeper forward fold pose stimulates digestion and massages your abdominal organs, helps to calm your mind, and reduces stress and anxiety.
Start in Mountain Pose, bend forward with your arms straight in front of you, and let them reach towards the floor. Insert the palm of your hand facing up under your feet. Stick your elbows out. Make sure the surface under your feet is not hard. You can bend your knees to reach under your hands if your hamstrings are tight.
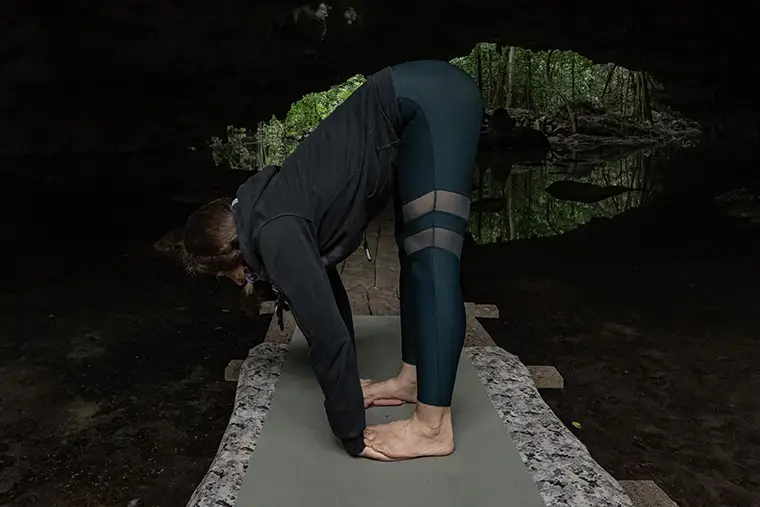
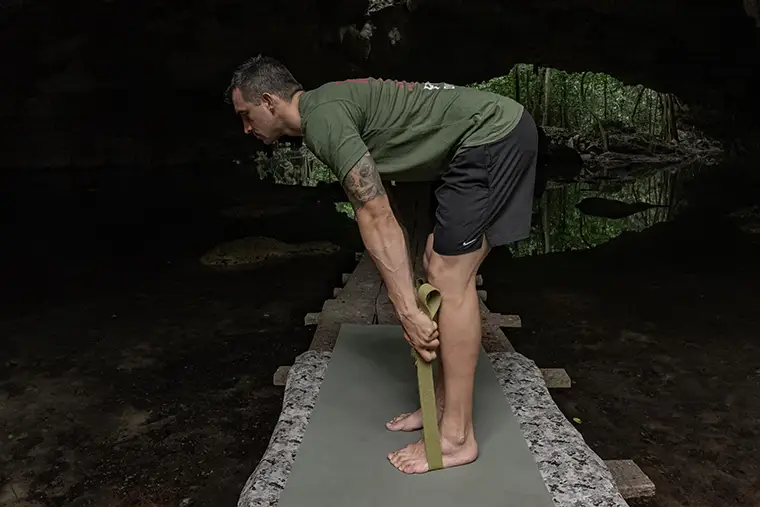
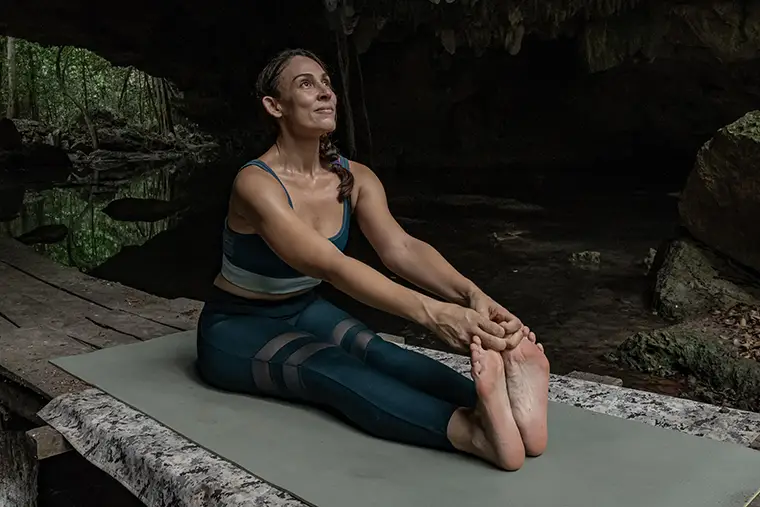
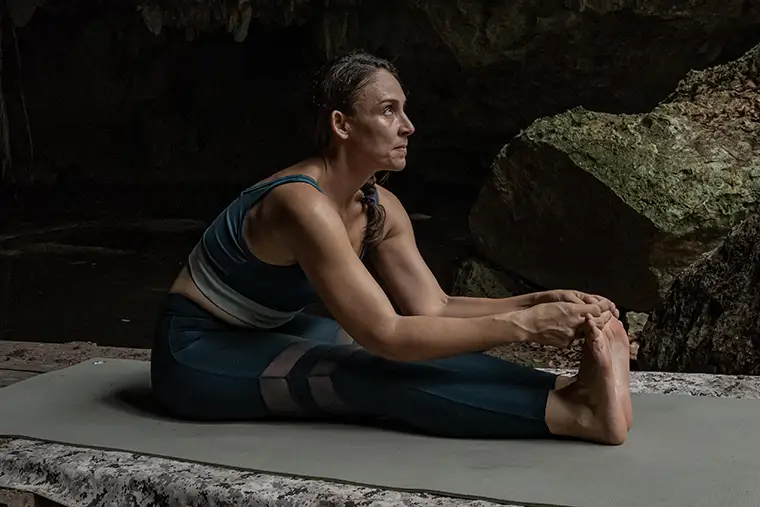
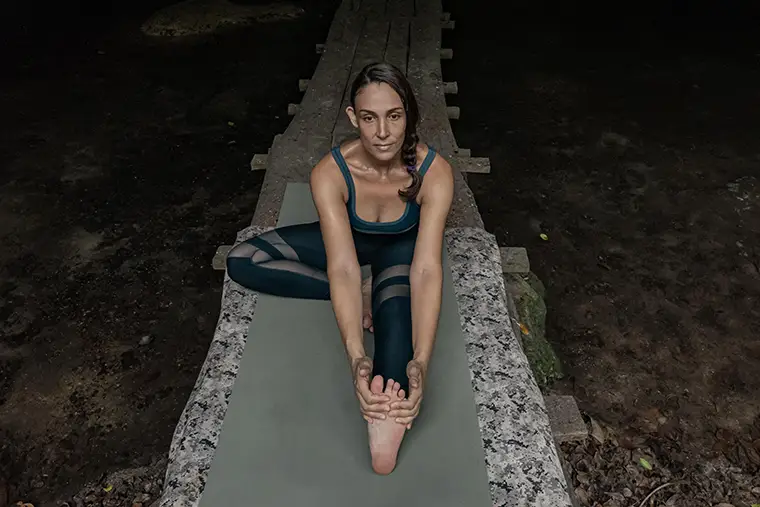
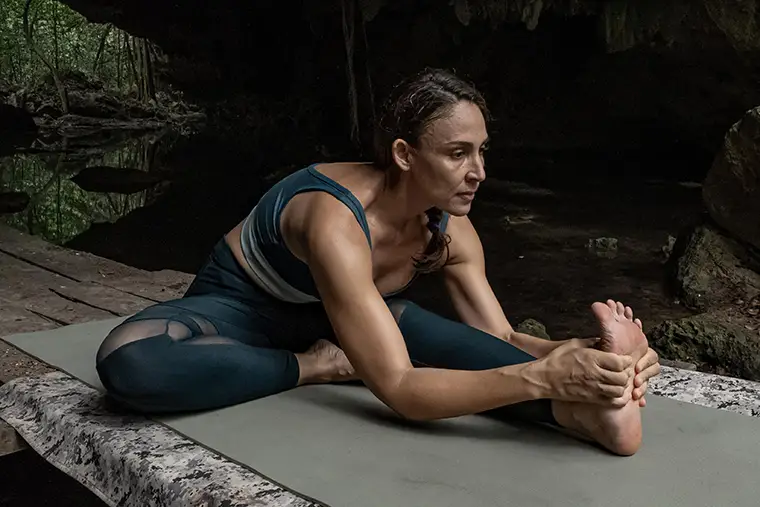
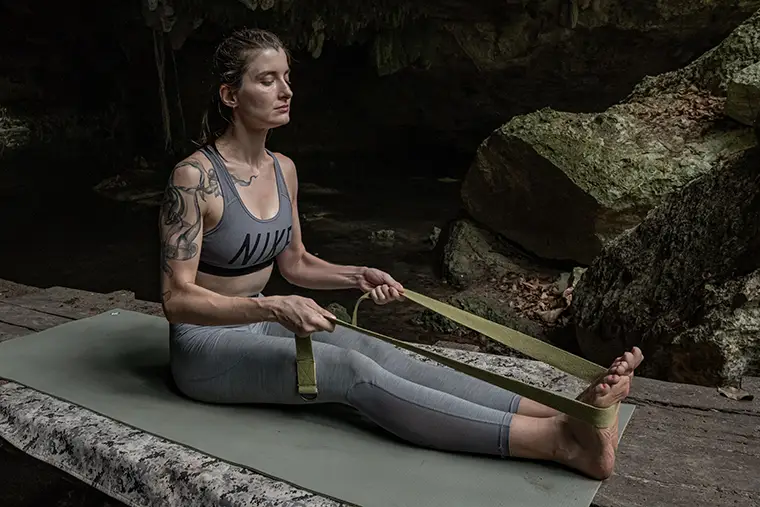
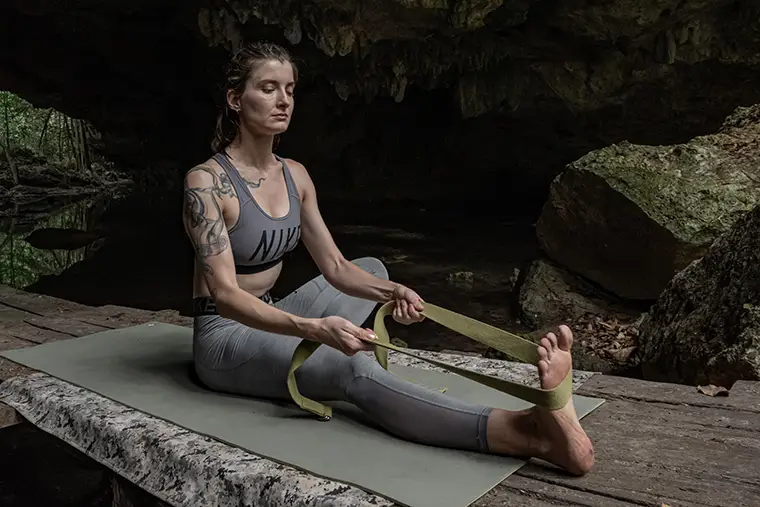
Paschimottanasana A, Seated Forward Bend
Benefit: This pose deeply stretches the dorsal part of your back. It helps to open your spine, tone your back muscles, and stretch your hamstrings and shoulders.
Sit on the ground, making sure your legs and back are straight. Lift your arms up and bend your upper body forward until you touch your feet. Hold them with both hands and use your feet to pull yourself forward with every exhale.
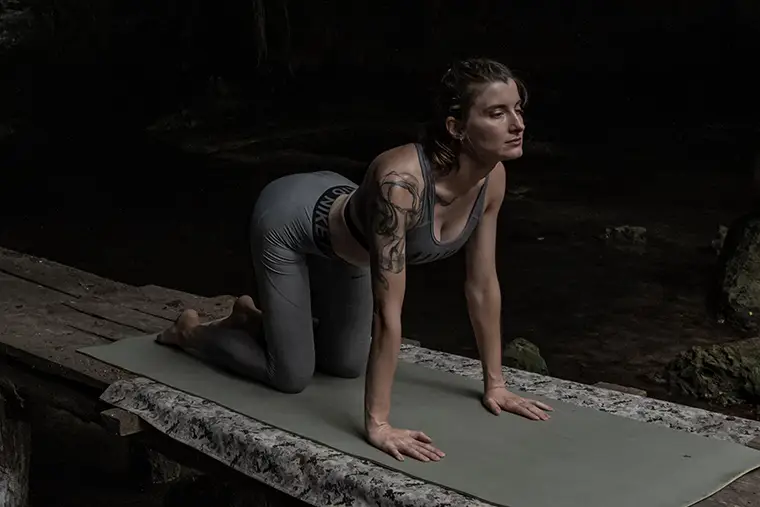
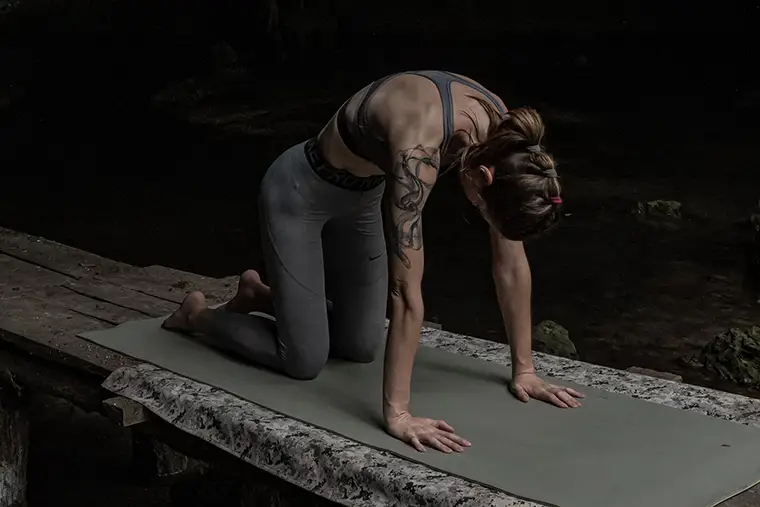
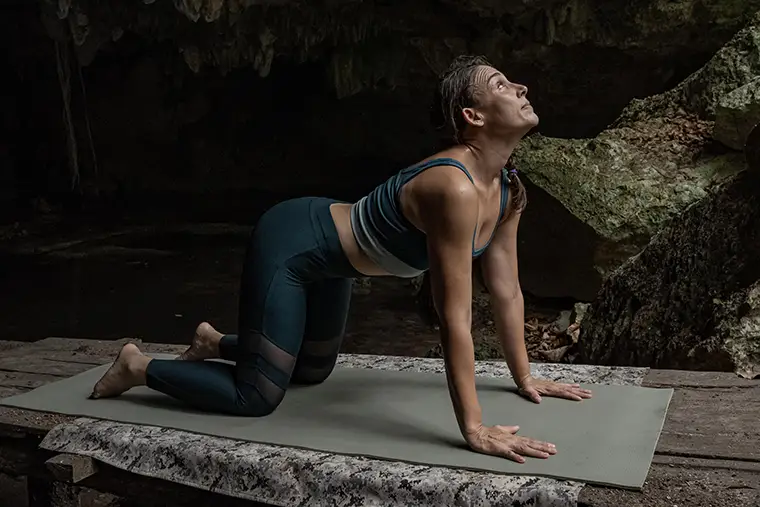
Cat-Cow
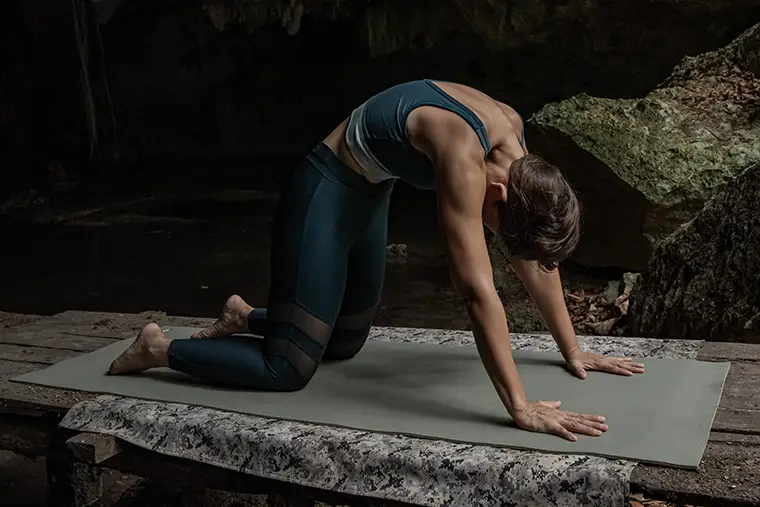
Benefit: This pose encourages flexibility and mobility along the whole length of your back by gently flexing and stretching your spine.
Inhale and look up while curving your back as if you were going to touch the ground with your belly, then exhale slowly while you bring your head down, chin to the chest, and curve your spine inwards as if you were going to touch the ceiling with your back.
Eka Pada Rajakapotasana, Pigeon Pose
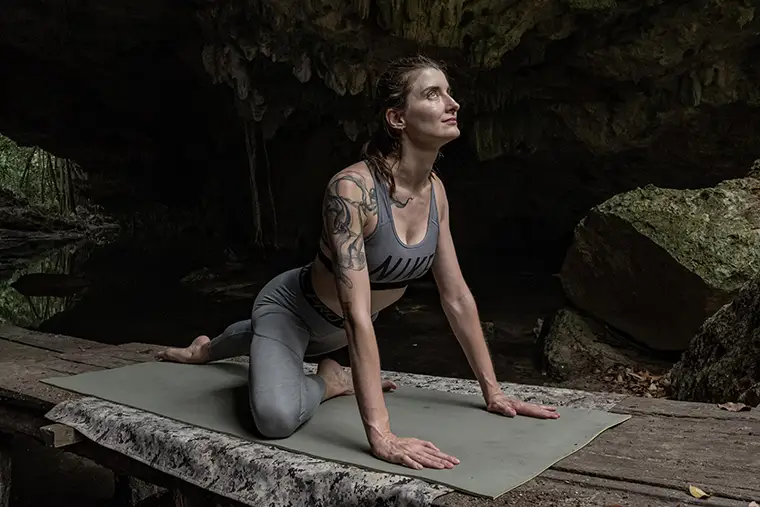
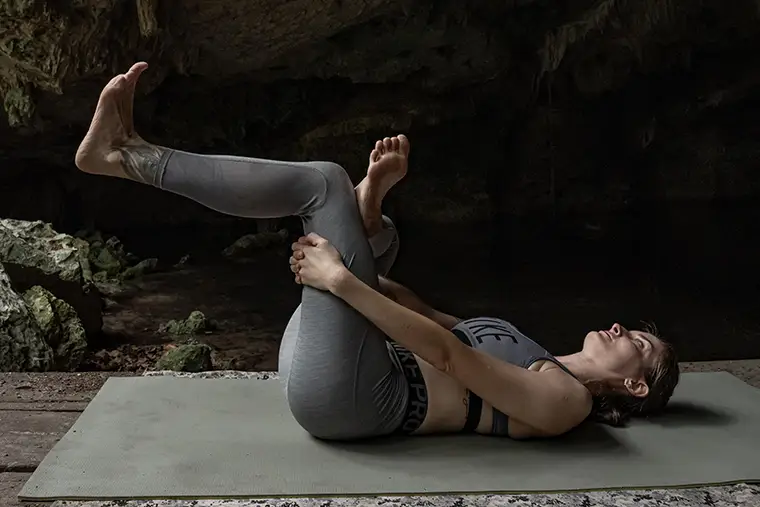
Benefit: It helps to stretch your hip flexors and work on a healthy lumbar curve.
Pigeon Pose targets your glutes, hips, and groin. Start with a big lunge, then place your forward leg sideways flat on the ground; use your hands to settle into the pose. The further your foot is away from your body, the harder the hip opener will be. Keep your spine straight. If you want to deepen the stretch, bend forward and rest your arms and head on the ground or on your leg.
Badha konasana, Butterfly Pose
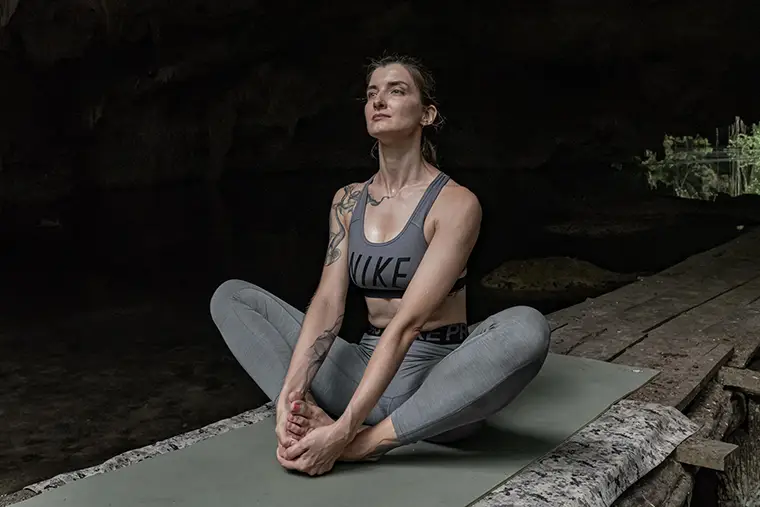
Benefit: This pose stretches your groin, inner thighs, and hamstrings.
Sit comfortably on the ground: make sure you’re grounded. Bring your feet together, and turn the soles of your feet up. Take a deep breath and on the inhale, bend forward as far as you can. Stay for a few breaths before coming back up on an inhale.
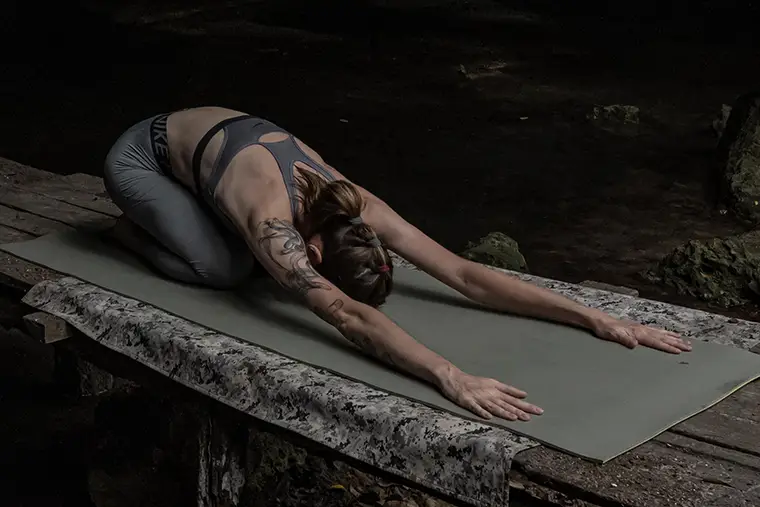
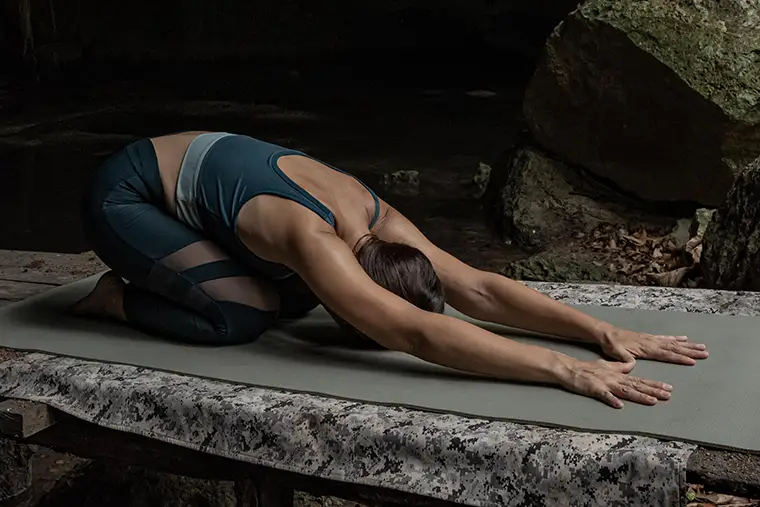
Balasana, Child;s Pose
Benefit: This pose allows you to gently stretch your spine, thighs, hips, and even ankles. Along with deep breathing, child’s pose can calm your mind and reduce anxiety and stress. It also increases blood circulation, specifically to your head.
Everyone’s favorite pose, it releases the stress from the whole body. Kneel on the ground with your knees slightly apart. On an exhale, bend forward until you touch the ground and find a comfortable position for your head, touching the ground with your forehead or cheek. Allow your arms to lay next to your body or extend them in front of you.
What to do next?
We hope that this article has given you enough tools to start a practice, use key concepts of yoga in your life as a diver, and strive for balance in Tech diving. If you have questions about yoga and diving, please reach out to us!
If you’d like to obtain some materials to practice on your own, you can easily find flashcards online and props to modify the advanced poses to work progressively towards them.
Joining a local yoga class for beginners is also a great way to learn about our body and how to align it, not only for tech diving but for all our other activities. A Vinyasa class is great for energizing the body whereas a Yin yoga class is an option for slow-paced, long stretches. In yoga, there is something for everyone.
DIVE DEEPER
PUBMED: Exploring the therapeutic effects of yoga and its ability to increase quality of life by Catherine Woodyard
PUBMED: How Breath-Control Can Change Your Life: A Systematic Review on Psycho-Physiological Correlates of Slow Breathing by Andrea Zaccaro et al
PUBMED: Yoga Effects on Brain Health: A Systematic Review of the Current Literature by Neha P. Gothe et al.

Tamara Adame is Mexican and full time cave instructor at ProTec Dive Centers in Tulum. She has experience as a CCR, cave and scientific diver, which has granted her access to international projects in Maldives, Alaska and Bikini Atoll. Tamara speaks and teaches in Spanish, English and French. One of her objectives as a technical instructor is to make cave diving more accessible to Mexican divers and young women. Previous to diving Tamara built a career in Marketing and was a yoga instructor. Follow her on Instagram at: @Cenote_Girl
Maria Shagina is originally from Kamchatka, but grew up and started diving in Ukraine. She did a lot of training in the Red Sea and in the cold waters of the Black Sea along with ice diving in lakes and quarries. She moved to Mexico in 2014 to become a fulltime cave diver and instructor. In 2022 she joined the Protec team. She now works full time guiding, teaching and further developing as an instructor. Follow her on Instagram at: @Maria.Shagina.

